Purpose: To see the
BMW Diagnostic Tool options is working or not, on 525i with an engine N53.
Diagnostic tool: BMW ICOM A2/
ICOM Next with ISTA
Important: compare possibilities of ISTA D with INPA.
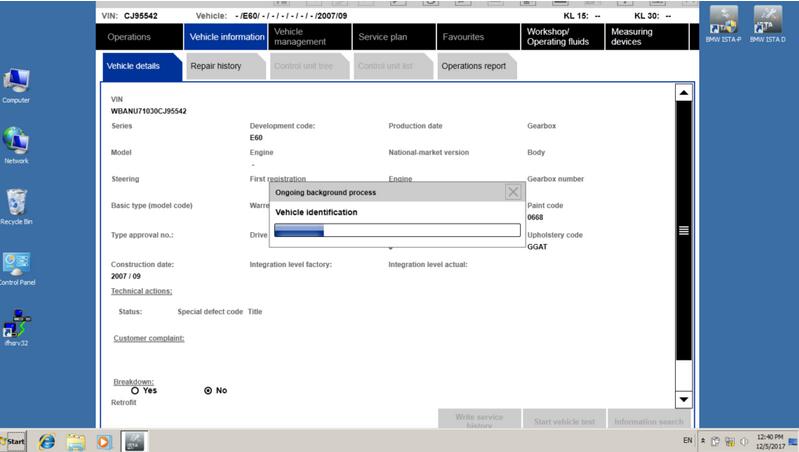
Vehicle information:
Car: BMW 5 series E60 sedan 525i
Year: 2007/09
Engine: N53
EURO
Manual
DME: MSD80
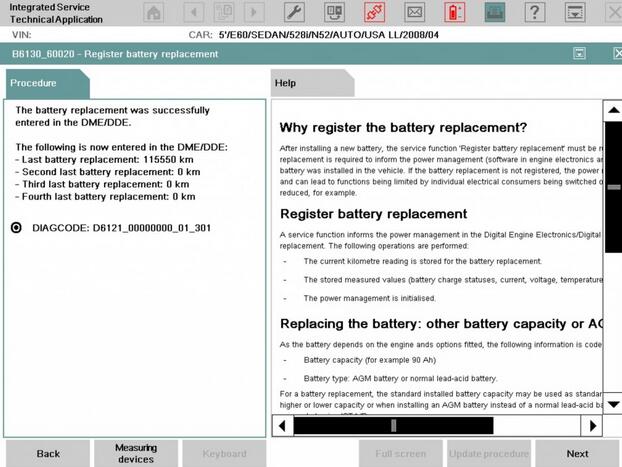
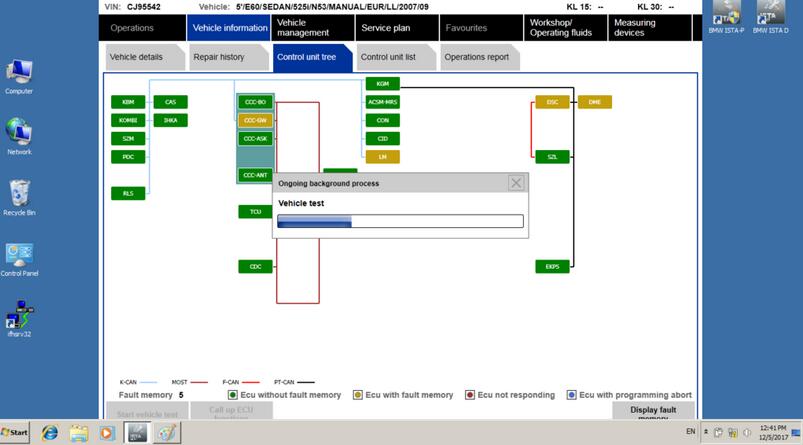
The test:
ISTA-D is identifying the vehicle

and reading FASTA information

the basic menu is available.
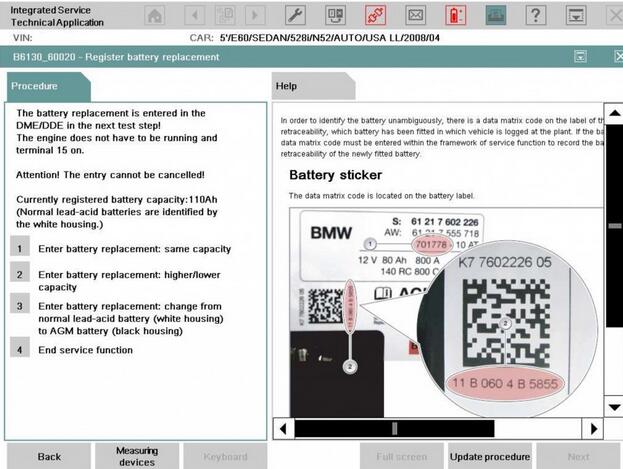
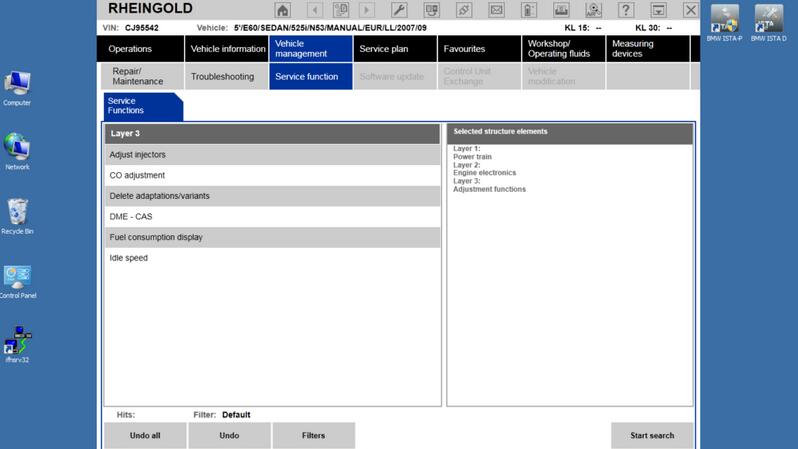
Service procedures and data, intended for the engine, are available in two groups:
a) basic menu: Vehicle management/Service function/Powertrain/Engine Electronics
b) Call up ECU functions menu of the engine management unit
In the basic menu you can choose:
a) viewing data correction of cylinder Rough run and Stoichiometric mixture;
b) coding the injector data;
c) coding new NOx catalytic converter and NOx sensor, activate Desulphation session;
d) delete adaptations;
e) perform misfire/Rough run test for cold engine and view the “opinion” of DME, which engine has problems with smooth running.
In DME Call up menu you can choose:
a) view live data;
b) perform activation tests for several knots.
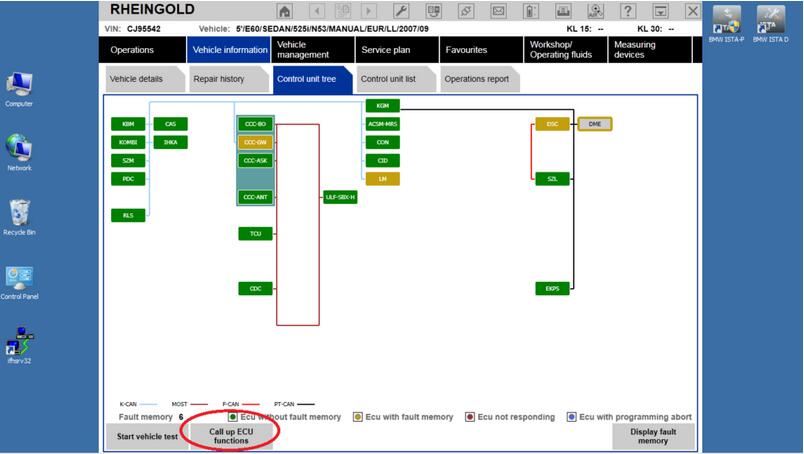
Now, start the review with DME Call up menu.
To enter it, click with Mouse on DME icon on the “tree” of units and press the button “Call up ECU function”.
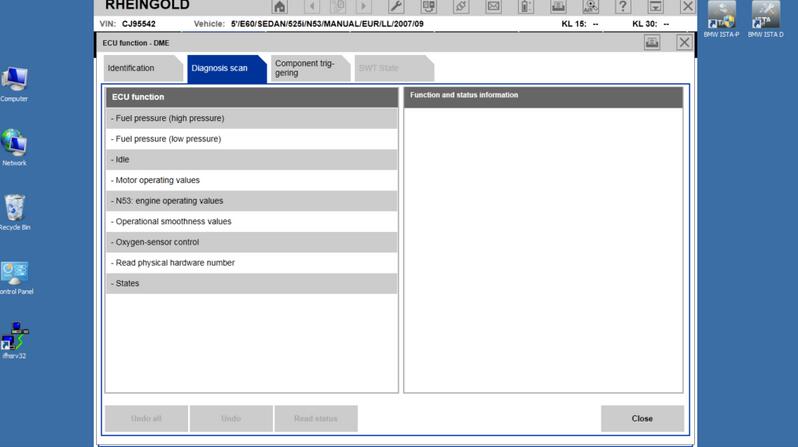
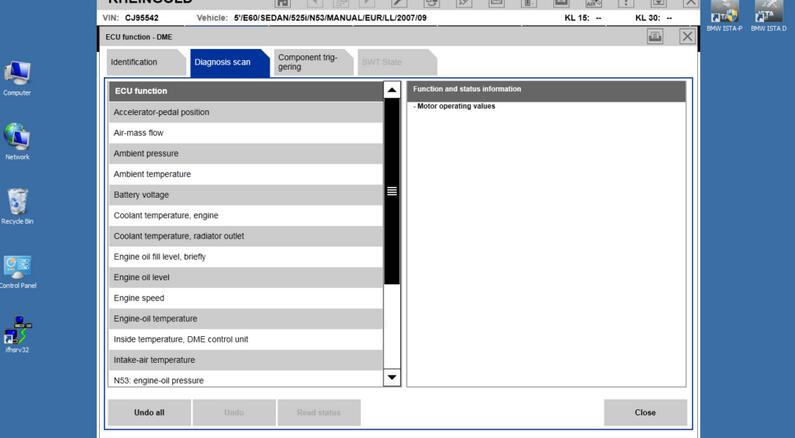
 Call up menu contains three basic choices:
a) identification: basic data of ECU unit;
b) diagnosis scan: live data;
c) component triggering: activation/test blocks.

“Identification” menu is very clear, so we move to diagnosis scan menu – content of it is seen in the image above.
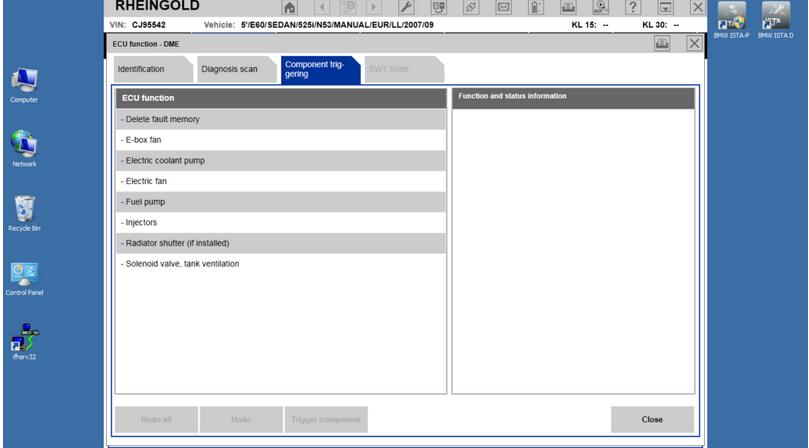
The content of Component triggering submenu :

Unfortunately, the amount of test blocks is tiny. As can be seen,
it’s possible to test the pressure of the low-pressure pump, in the
injectors menu: switch off any of cylinders, switch on the water pump
and electric fan.
Blocks of engine performance modes, Lambda probes, generator, VANOS, EGR and many other important knots are not available.
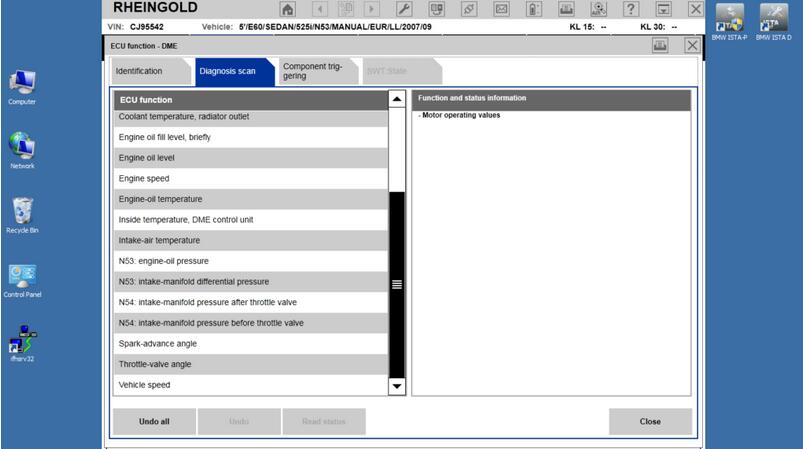
Diagnosis scan submenu.
a) fuel pressure (high pressure);
b) fuel pressure (low pressure);
c) idle;
allows to view exact values of the parameter and are not very
interesting. Only remark (it refers to all analog/live data values,
displayed by ISTA):
a) data representation is in small size, it’s hard to see the data, for example, during the driving session;
b) main part (with rare exceptions) of data have no reference value, no
min/max limits displayed; no explanation for specific data;
c) bar type indicators are not used – they would ease the viewing of variables.
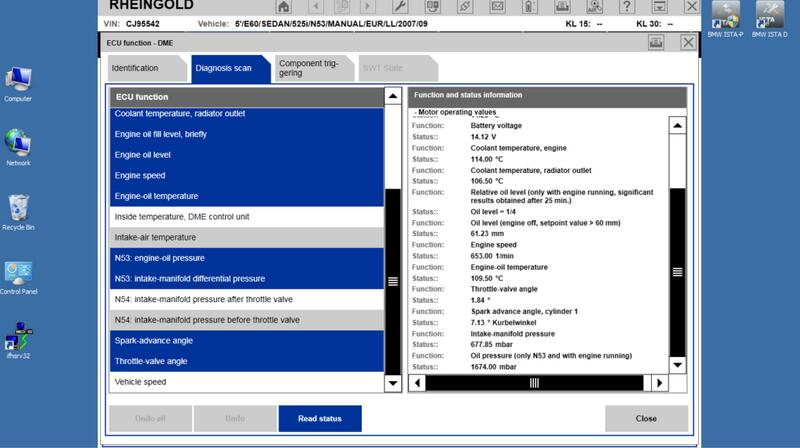
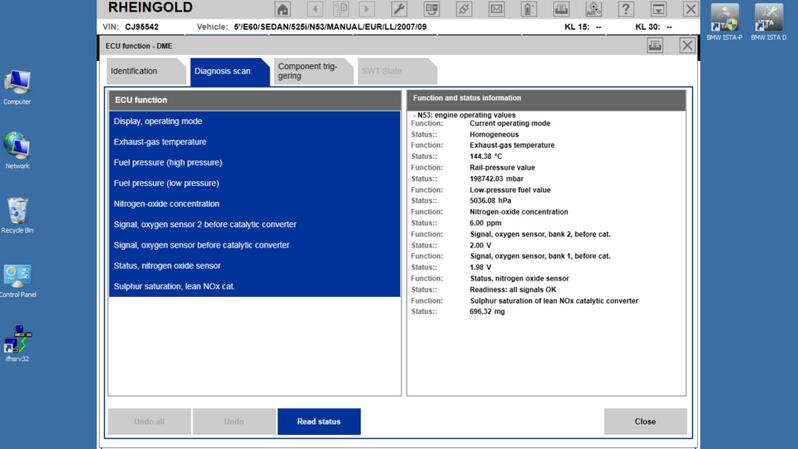
The content of Diagnosis scan submenu, choosing ”Motor operating values”:


To read the required parameters, they have to be chosen (it/they will color in blue) and press the button ” Read status”.
Example, how does a viewing of live data look’s, using ISTA D:

Unfortunately, data are opaque – there is no visible separation, no ref/min/max limits, no bar indicators.
Several disadvantages of menu:
a) oil pressure – no required oil pressure displayed;
b) no PWM for keeping up the pressure is displayed;
c) data of detected pressure are displayed with an offset of -1000hPa.
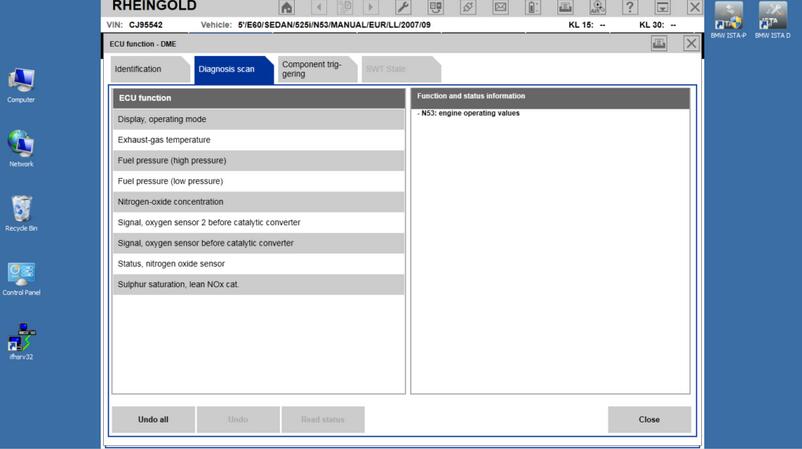
The content of submenu, choosing operating values of the N53 series engine:
 Live data of these parameters:
 This submenu has “several” disadvantages:
a) the engine performance mode is displayed, but no Lambda values, with which the engine works, can be seen;
b) no possibility to overlook data during the desulphation process;
c) no PWM both for the low-pressure and high-pressure system can be seen
– no information of system’s ability to hold the pressure;
d) no Offset values for NOx sensor data are visible, no reported Lambda values (wide-band and narrow-band).
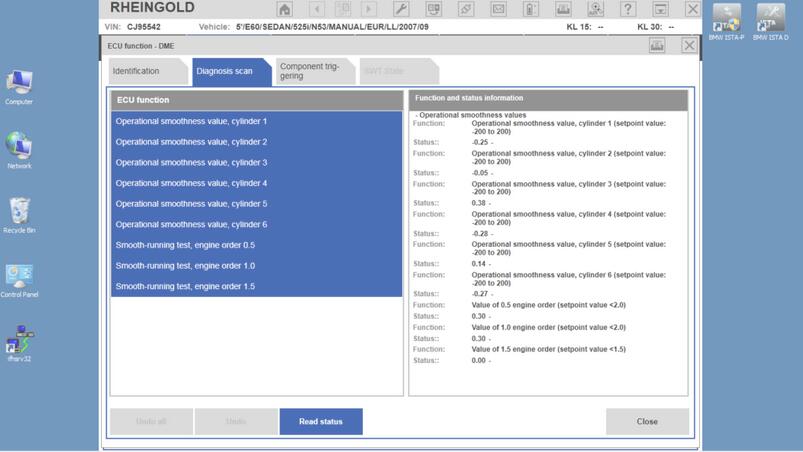
Data of “Operational smoothness values” submenu:

In this menu, Rough run value min/max values ( +/-200) are displayed.
According to the software release, in case of the normal engine
performance, the values fluctuate in limits of +/-0.2, for some releases
– only within limits of 0.02. It means, 0.1 or even 0,01% of max
displayed! Conclusion – these indicated values are just confusing the
user!
It’s not even worth to mention, that math, which would describe the coefficient ”engine order 0.5/1.0/1.5”, is not even present.
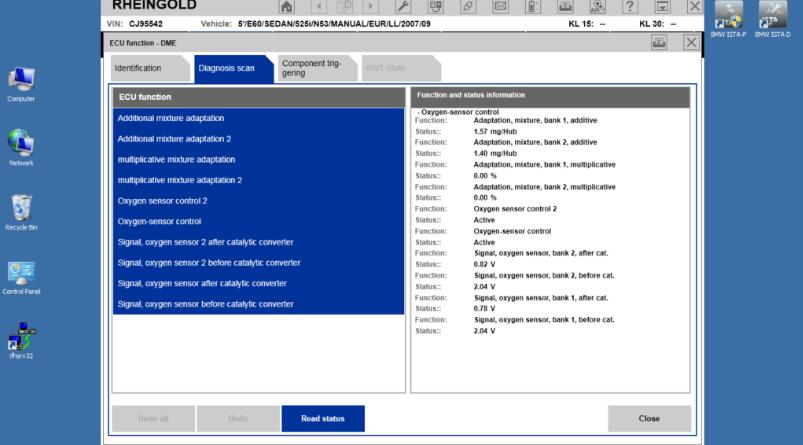
Content of ”Oxygen-sensor control” submenu:
 This submenu has “several” disadvantages:
a) multiplicative adaptations are not displayed at all;
b) Lambda value for wide-band probes is not calculated/displayed; no description, how to interpret “voltage” indications;
c) PWM of probe heating is not displayed, from the status description
it’s not clear, is the probe being heated or is already heated;
d) no Nernst resistance for probes is displayed, chemical activity of
probes cannot be seen; no manual control of probe heating is possible;
e) the engine performance mode (requested/confirmed) is not displayed;
f) required Lambda values and their conformity to measured are not displayed.
No data available about:
a) injectors: learnbits;
b) injectors: real time values (opening time; multiplicative adaptations; voltage; energy, etc);
c) injectors: mechanical and chemical tests/results.
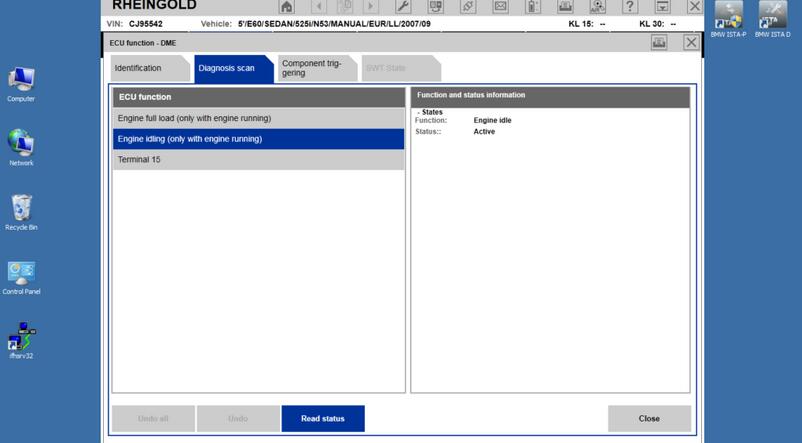
Submenu ”States” contains some of the status bits:

Unfortunately here the viewing of engine Live data ends. As you can
see, the amount of displayed data is many times less than with INPA, and
displayed data cannot be viewed easily.
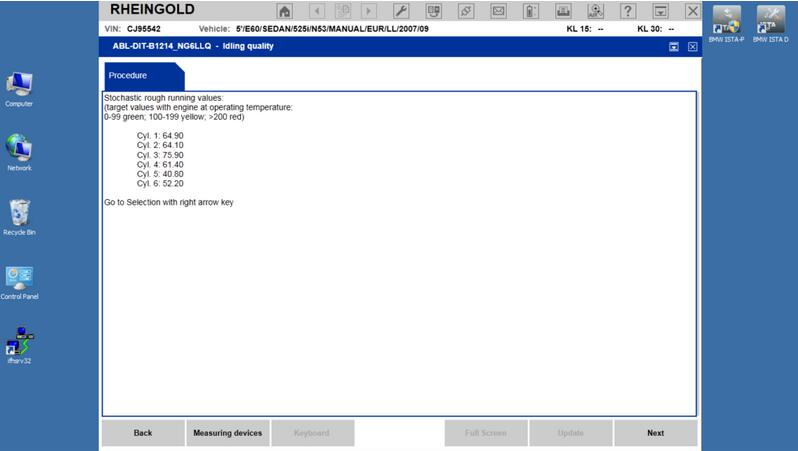
Vehicle management/Service function/Powertrain/Engine electronics menu,
 Idle speed/Idling quality submenu:
 Rough running values:

Rough run values for correctly performing engine display lasting
disbalance, therefore it’s not clear, what are these data. Possibly –
applied Offset type corrections for each injector to reach smooth
performance.
Stochastic irregular operation data:

Also regarding these data – no information. In ideal scenario – all
values are targeting 0? Or, most probably: all values are targeting 50;
increased value – decreased mechanical efficiency.
We can only pay our condolences to a specialist of the dealer center, who has to work with such “data”.
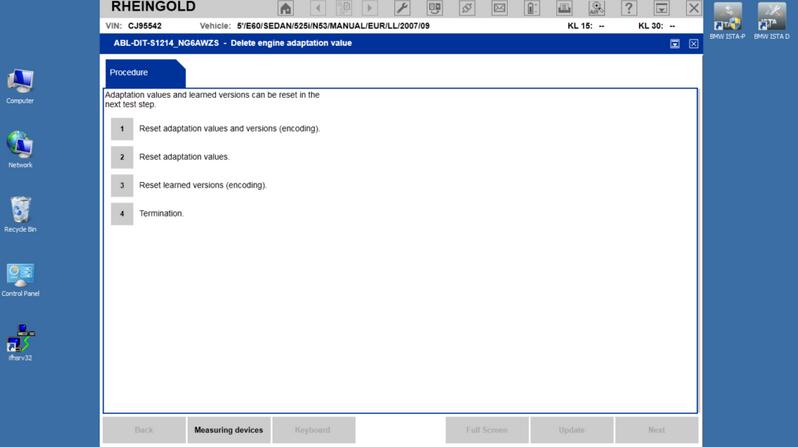
Delete adaptations submenu:

Unfortunately – no information, which menu deletes which group of adaptations.
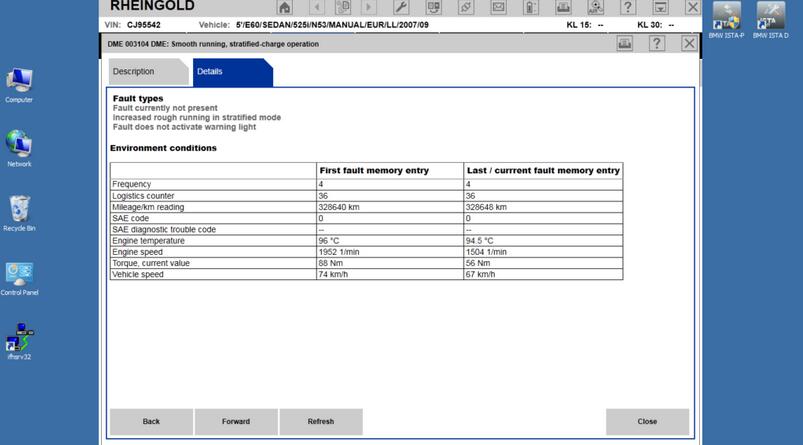
Also, information regarding stored error messages is more than modest:
 For example, in the existing situation, INPA freeze-frame will additionally display:
a) engine performance mode (Homogeneous/Homogeneous lean/Stratified charge);
b) engine status (work or heating up);
c) offset, multiplicative adaptation and integrator values, etc.
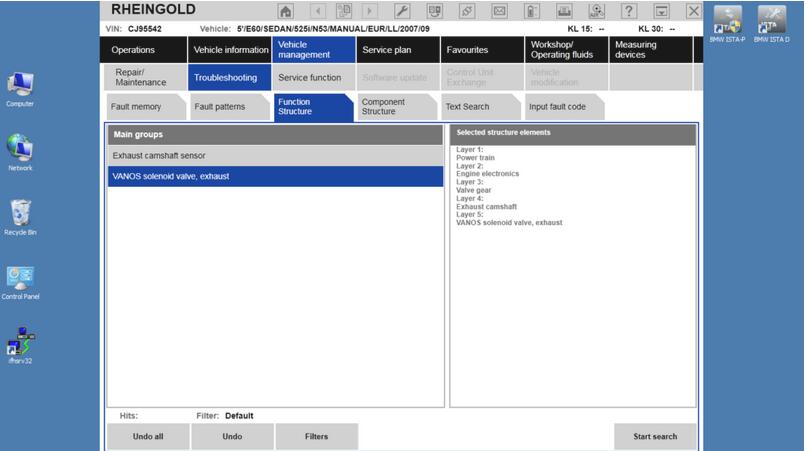
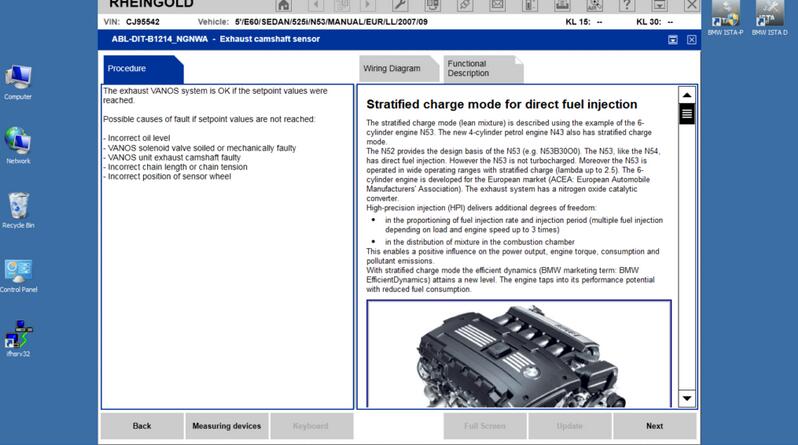
Data for separate knots can be seen into appropriate functionality blocks, as an example, we will view test block of VANOS:
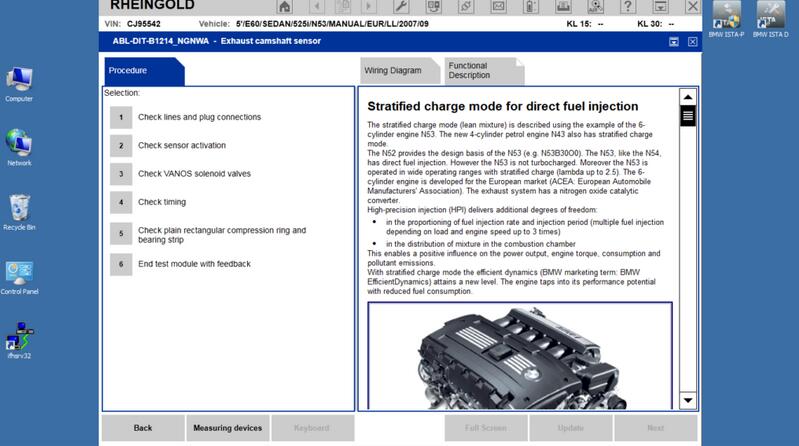
 After choosing this test module, the menu opens:
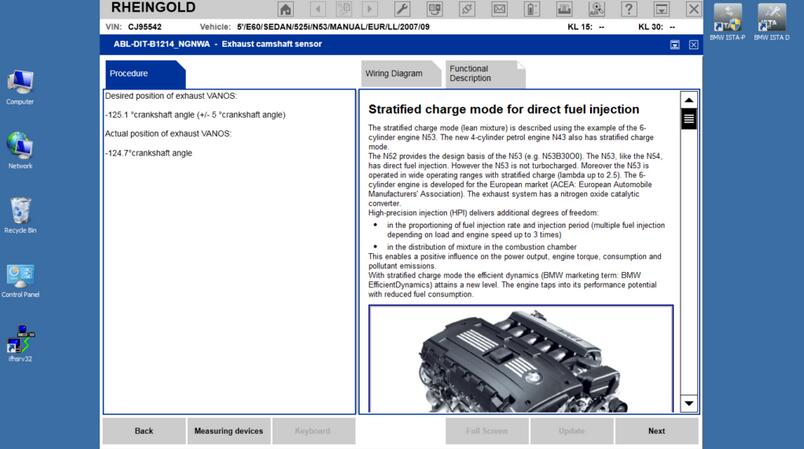
 The detected position of VANOS can be seen:

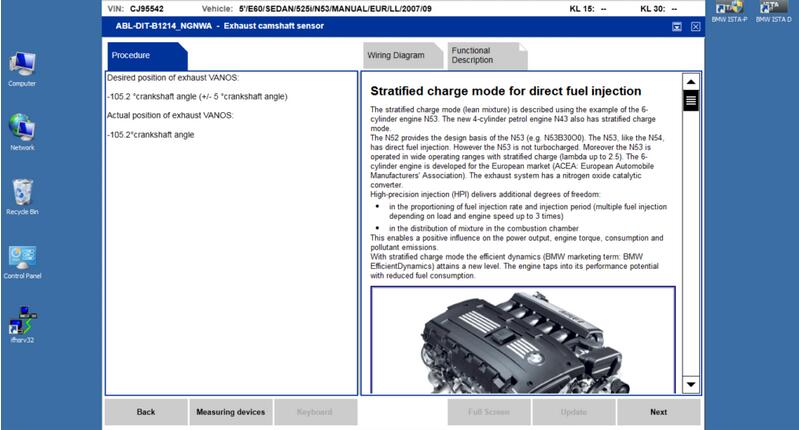
It is possible to perform test block, which tests the ability of
VANOS knot to maintain the required position in one, fixed position:

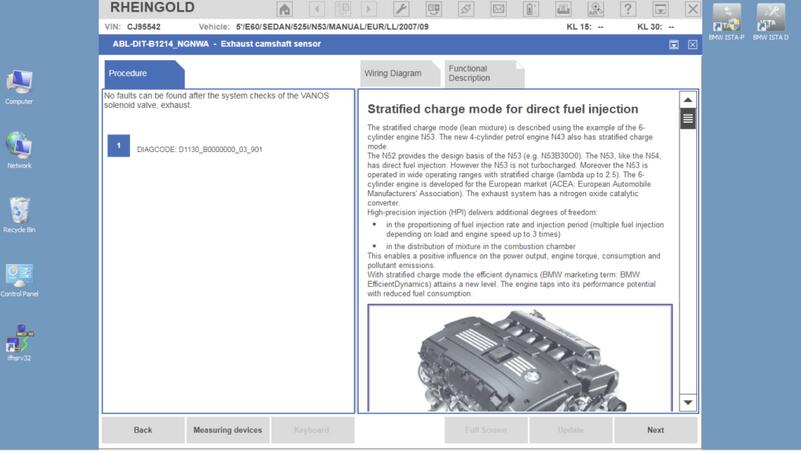
After performing such tests, the diagnostics specialist has to take
the decision by himself, does the VANOS performs correctly – ISTA
displays following menu of suggestions:


As you can see, this menu doesn’t give exact answers.
Additionally, there are no possibilities to choose the position of
camshaft manually, evaluate the PWM of the valve, it’s jittering.
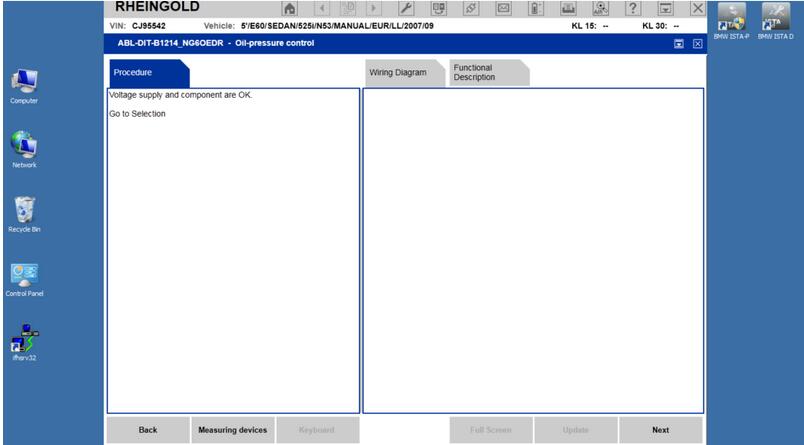
The situation with, for example, checking the oil pressure is even
sadder. There is no possibility to compare the inquired and measured oil
pressure, no possibility to evaluate the PWM of oil valve. No test
block, which could be started. Only testing option, offered by ISTA:
evaluation of PWM of the valve with an oscilloscope. And, if rectangular
impulses are observed, ISTA reports, that everything is in working
condition!

Everything is in order, not taking into the account the PWM value, not taking into account it’s jittering? Impressive!
It is regrettable, that the dealer specialists are forced to work
with such weak diagnostic tool. INPA options for MSD80 diagnostics are
incomparably wider, but, for unknown reasons, INPA is banned for using
in dealer service centers.
http://forobd2tool.com/blog/2018/09/05/how-to-diagnose-bmw-msd80-dme-with-inpa-software/