Thursday, November 18, 2021

ICOM Next cannot detect by Itool Radar Solution

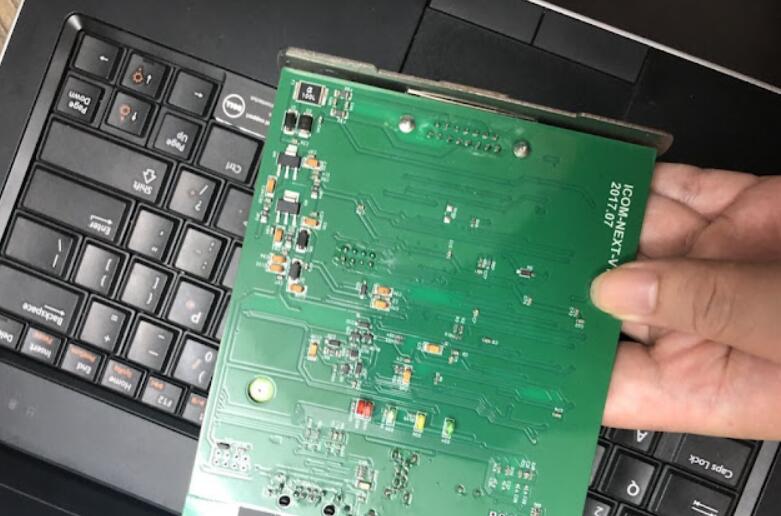
Problem: I have a BMW ICOM Next. I updated the firmware for it. Now it cannot be found by the itool radar software. I tried to restore using the USB flash method. However, when I reset Icom by pressing and holding the pin hole near the USB port, it does not happen to my Icom Next.
ICOM-Next-cannot-be-detected-by-Itool-Radar-Solution-2
ICOM-Next-cannot-be-detected-by-Itool-Radar-Solution-3

How to restore this Icom Next?

SOLVED by re-injecting via USB key files : “USER.settings” and “user.settings.log”  (can find in “Restore ICOM.7z” in ISTA installation package)
ICOM IP address was lost and now all OK !!!!

If you want to know more about bmw diagnositc tools, please click bmw trouble repair.

Tuesday, November 16, 2021

How to Use R270 Ncs Expert Retrofit BMW M3 Instrument Cluster

This is a DIY guide that explains how to retrofit another instrument cluster in your car. In this case I upgraded my 128i to an M3 cluster, but all coding processes apply to upgrading other 1’s clusters (e.g. 135i clusters in a 128i).

Important notes: I am using Windows 10 Home 64-bit on a Lenovo Legion gaming laptop. Nothing special about computers here. A laptop is preferable as you will need to do some in-car coding. The donor instrument cluster MUST have fewer miles than your car to use this process. I bought an instrument cluster from a manual M3 and put it in a manual 128i. Please do not ask how to install in an automatic, because I have no idea. I would assume the process is similar (it’s probably exactly the same since NCS Expert really does all of the footwork for you). I have used all of the software below and have had success. It is reasonable to assume that it will work for you too. When it doesn’t, Google is a wonderful tool that fixes issues for a lot of people (myself included). You should have a basic understanding of NCS Expert and how it works.

Materials for Coding the New-to-You Cluster:
-R270+ Programmer (like this one)
-SOIC8 Testing Clip (like this one)
-Used Instrument Cluster (This process requires that it has less miles than your car; easy for me, with 196k miles when shopping for M3 parts)
-T10 Torx screwdriver (only necessary for M3 clusters)
-Install R270 Programmer Software (this download is clean, I wouldn’t recommend using the disc included with the programmer, RUN SETUP.EXE to install)
-Install HxD hex editor (here)
-Mike’s Easy BMW Tools (this is what works for me)
-K-DCAN Cable (this one works for me)

Preparing for Coding:
Make sure that the required software has been installed and that the programs start correctly. Test the BMW Tools by starting INPA and checking that it is connected. First you need to open your new instrument cluster. The M3 clusters have four silver T10 screws on the back that you need to loosen before attempting to take this thing apart. After these screws are pulled out, working your way around the cluster, open each of the 6 holders (2 on top, 2 on the bottom, 1 on each side) and slowly pull the two halves apart. Now you need to pull off the gauge needles. To do this, I recommend cutting out a four inch square piece of paper and then cutting a ~ 2 mm wide slot about 2 inches long, starting in the center on one of the sides and going to the center of the paper square. Now fit this square of paper under the needles and over the measuring wheel. The slot is designed to allow you to slide the sheet of paper under both needles (speedometer and fuel or speedometer and oil temperature) and around their pins to protect the dial (they scratch easily). To remove the needles, I recommend a very thin fork that will fit around the pins. Just work it under the needles and carefully pry it up. Shoot for as vertical a movement as possible with as little twist as possible. If you break the pins that hold the needles in place, you’ll practically scrap that cluster. In a pinch, a thin, flat screwdriver works well. Set the needles aside in a safe place after you’ve played with them (we all do).

This is difficult to explain, but here it is: you now need to flip the cluster over onto the black plastic side. You will see a rectangular 18-pin connector (it’s the only connector, but I’ll try to be detailed). You’ll need to push this connector down (toward the bottom of the cluster assembly), push it out so that the white plastic piece pops out a little, then push in the opposite direction on the side that doesn’t pop out and wiggle somehow dealt with the matter. The end result is a large piece of black plastic and then the white plastic part with the back of the board now exposed. Now separate the white plastic from the circuit by loosening four small clips (2 above, 2 below). For 1-series clusters, you must also remove the ribbon cable attached to the LCD panel. Just unplug it from the long white connector at the bottom of the board. Now you can clearly see the brains that make your instrument cluster work, a lot more is happening than you think, far from old cars (which makes our job super easy). You are now ready for the first part of the coding.

Clearing Old VIN from EEPROM:

Pull out your R270+ and your SOIC8 test clip. Find your EEPROM. It is an 8-pin chip (four on a side). On the M3 cluster, it is just above the left corner of the LCD display (as shown in the huge picture below). The clip I used (link above), has a pink wire denoting Pin 8. If you look at the text on the EEPROM, correct side up, Pin 8 is on the bottom left of the chip.
Ensure everything is plugged-in and connected. Launch the R270 programmer application, select which chip it is (printed on EEPROM). All three clusters I’ve seen had 080D0WQ chips, but verify yours because they can be different. Hit “Read” ignore the obnoxious beeps from the programmer box, and save the .BIN file to your desktop (you can save it anywhere, really). Now, close the R270 program, and open HxD. Open the .BIN file. Scroll down to the -2E0 line, and highlight all data in that line, and replace it with FF’s. Line -2E0 should read “FF FF FF FF FF FF FF FF FF FF FF FF FF FF FF FF” when done (you could copy that and paste it into HxD, too). Save the .BIN file, close HxD, and open the R270 app again. Load the .BIN file, then verify the selected chip, and hit write. This process will take about a minute, and there will be lots of beeping.

How-to-Use-R270-Ncs-Expert-Retrofit-BMW-M3-Instrument-Cluster-1 (2)

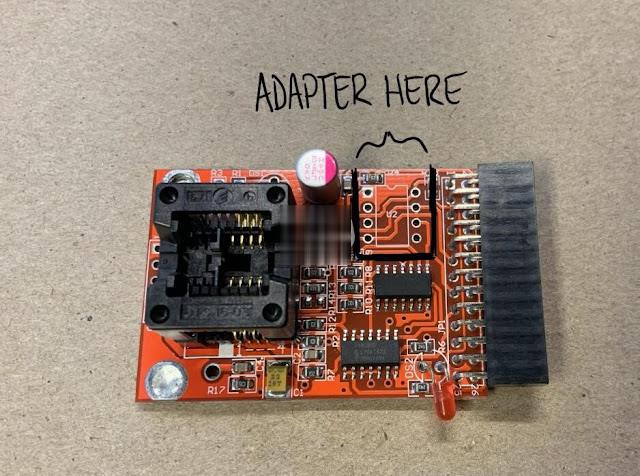
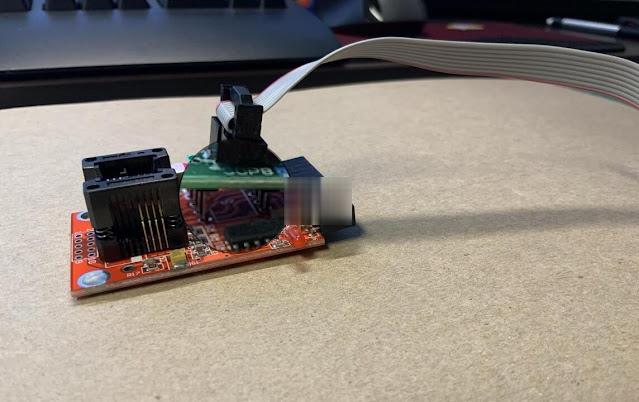
The programmer comes with just the red board. The clip comes with two adapters, I used the black one with the keyed connector for the clip itself and simply inserted it into the pin holes next to the ZIF socket. (Pic attached)

How-to-Use-R270-Ncs-Expert-Retrofit-BMW-M3-Instrument-Cluster-2 (2)
How-to-Use-R270-Ncs-Expert-Retrofit-BMW-M3-Instrument-Cluster-3 (2)

Once finished, you are done with this part of the install. Disconnect the programmer, and, minus the needles and front cover (part with clear plastic), reassemble the cluster. You should ONLY have the back black plastic part, circuit board, and white plastic part put together.

Coding Cluster to Car with NCS Expert:
After you’re done being extremely happy that you did a computer thing, go out to your car with your half-cluster and your needles.I would disconnect the negative battery lead for this part.Remove your original cluster, there are two torx (T15??) screws at the top of the hood. Remove those, then use a thin flat-blade screwdriver to push the top of the cluster downwards, then pull the cluster out. Undo the connector on the back (there’s a latch mechanism, so be aware of that).Now, connect your new-to-you cluster, and THEN reconnect the battery, if you disconnected it.Open your computer, turn the ignition on (door closed, engine not running, climate control unit should turn on). Connect your K-DCAN cable and verify communication with INPA. Open NCS Expert, load “Default profile” (Mike’s Tools). Hit “VIN/ZCS/FA” then hit “ZCS/FZ f. ECU” and select “E89″ for chassis, then “CAS” for module. Give it a second to fill VIN and VO shipped shipped back to hit “Process ECU” and attempts to hit ok. “Change job” and attempts to the it acceptable to will take a couple seconds and there will be beeping and weird noises. Once done, your new cluster is coded to your car’s VIN, and will not show any errors for things your car doesn’t have.loading..

If you want to know more about bmw diagnositc tools, please click bmw trouble repair.
Wednesday, November 10, 2021

How to Fix BMW ICOM NEXT not work

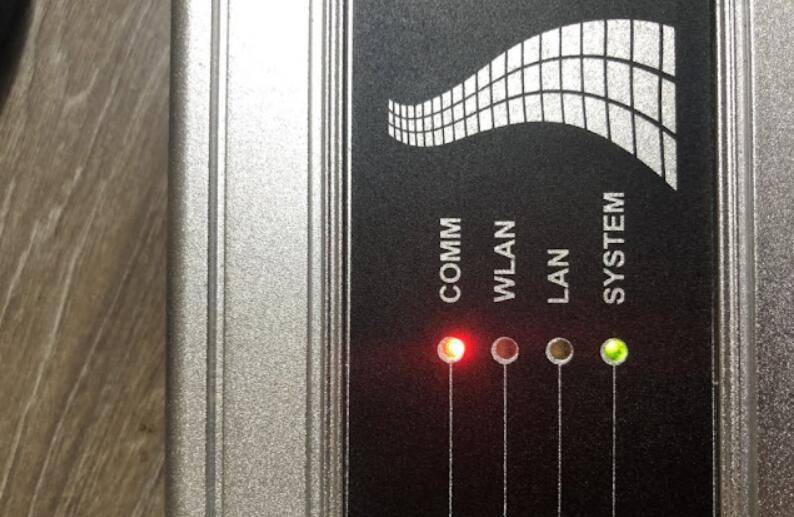
Do update Emergency Firmware on BMW ICOM Next for fix troubles when it not find IP address or all LEDs show Red Color
ICOM NEXT Error:

I have one BMW ICOM Next bought from China have been use 2 years great ,but sundenly it stop work .It will not connection any Vehicles and Programmer says Etherenet can’t find IP address . the ICOM NEXT mux all LEDS going Red and the System LED blinking Red-Yellow .
BMW ICOM NEXT not work Soultion :

1.Go to check BMW ICOM programmer Directory :C\ProgramData\BMW\ISP\data\TRIC\ICOMNEXT\ICOM-Image-XX-YY-ZZ( Show hidden files if you not find it ),if there have more than one ICOM-Image-XX-YY-ZZ file ,then choose the most recent one for last updates .

2.Copy the file ICOM_Next_app_yyyyyy.tar.gz and ICOM_Next_rootfs_xxxxxx.tar.gz to Your USB Disk ROOT Directory(Important) .

3.Disconnect ICOM NEXT Mux from Power adapter or Vehicle,And pull the USB Disk to ICOM’S USB port

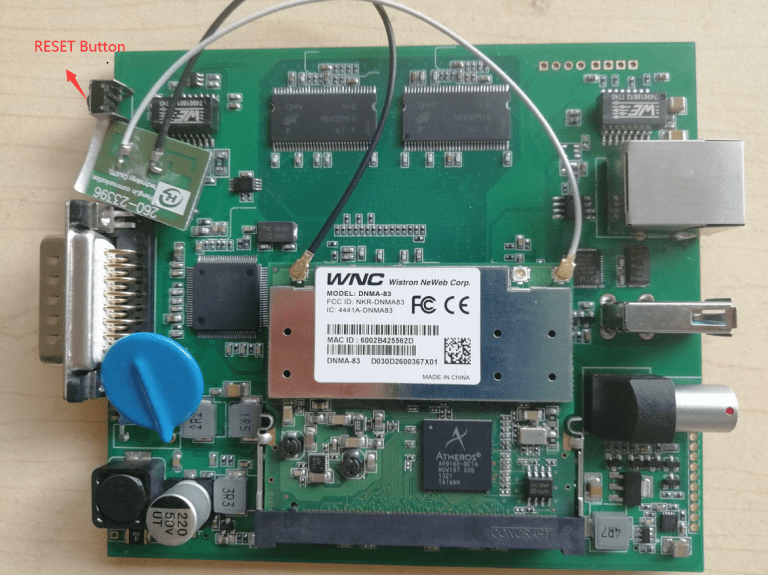
4.Press the Reset Button and keep Hold,another Hand held the OBDII Cable with vehicles diagnotic socket(Start Engineer for supply power ),the whole LEDS will glow red.

How-to-Fix-BMW-ICOM-NEXT-not-work

5.Now release the reset button ,Press again 3 times within 4 seconds. After there will be going do firmware update

6.Wait several minutes until all LEDS stop glowing(Do not disconnect ICOM mux as long as any LED glows red)

7.The emergency firmware update is finised !now you can pull out USB Disk and try Connect LAN Cable to vehicle for Test .all setting will need be reconfigured since it have been lost .

If you want to know more about bmw diagnositc tools, please click bmw trouble repair.
Sunday, November 7, 2021

How to Get BMW ICOM Next Activation Key

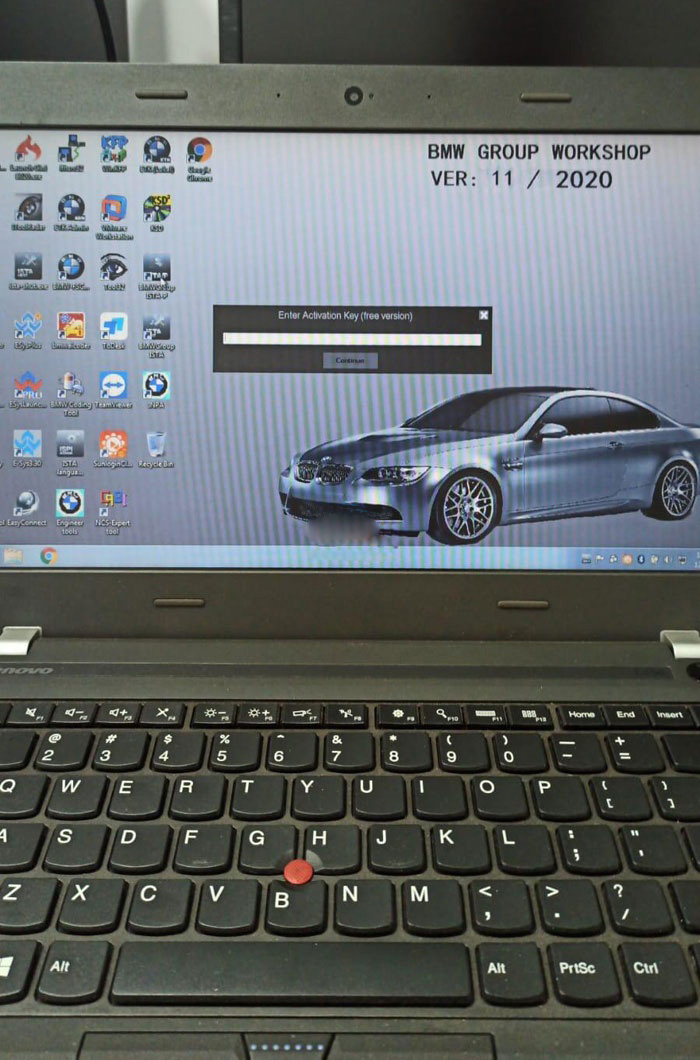
I recently bought a BMW ICOM Next emulator with latest HDD.  It asks me to enter activation key when run ISTA-P 3.67.1. Where can i get this activation key?

How-to-Get-BMW-ICOM-Next-Activation-Key-1

Obd2tool.com solution:

How-to-Get-BMW-ICOM-Next-Activation-Key-2

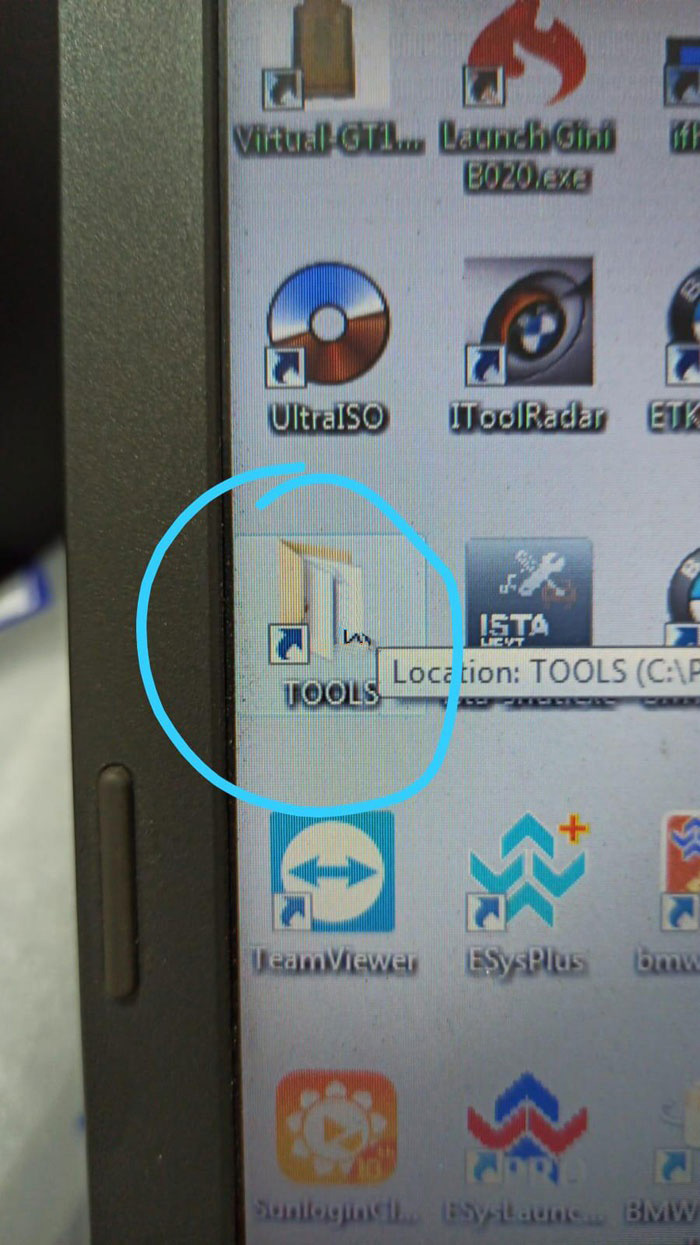
Open TOOLS folder on desktop

How-to-Get-BMW-ICOM-Next-Activation-Key-3

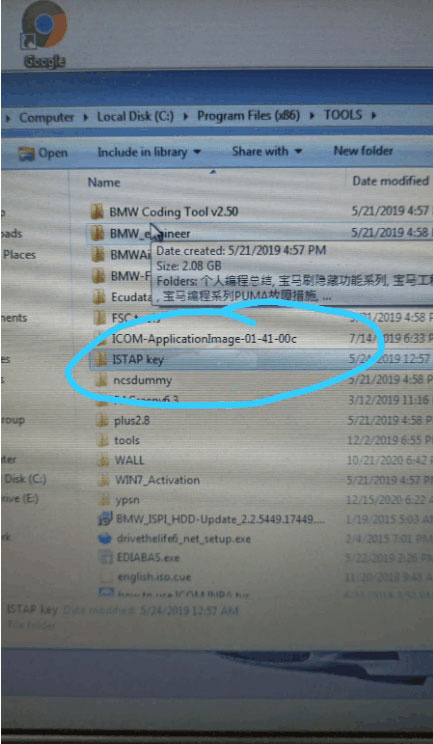
Open ISTAP key folder

How-to-Get-BMW-ICOM-Next-Activation-Key-4

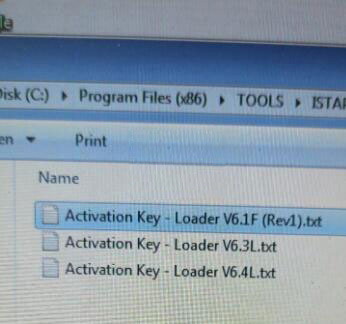
Open Activation Key- Loader V6.4L text file

Copy and paste activate key to corresponding area

How-to-Get-BMW-ICOM-Next-Activation-Key-5

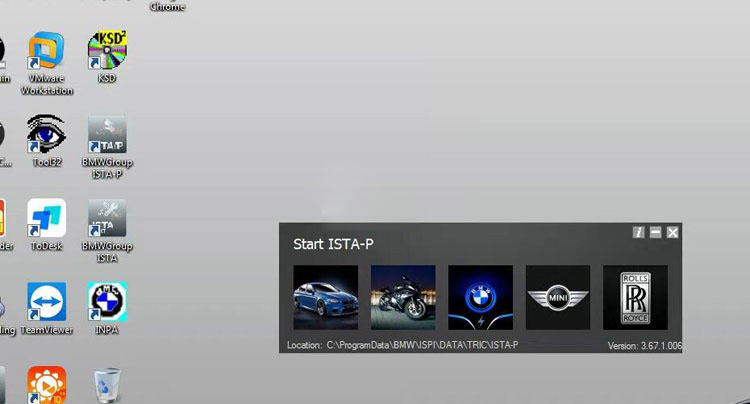
ISTA-P is activated successfully.

If you want to know more about bmw diagnositc tools, please click bmw trouble repair.

Friday, November 5, 2021

How to configure Expert Mode of BMW ICOM ISTA-D ISTA-P

One of the WIFI BWM ICOM A2+ B+C diagnostic system with ICOM Rheingold ISTA-D ISTA-P customers reported that after he replace the ICOM firmware to V1.38, however he fail to make use of the WIFI wi-fi connection and Expert Mode.
Here is the correct answer supplied:

Expert Mode:
BMW ICOM with Expert Mode/ Developer Mode permits BMW customers and technician rather more coding and programming prospects, like self-leveling suspension, facet airbags for rear passengers, computerized operation of tailgate, distant closing home windows and so forth capabilities. The ICOM Rheingold software program is suitable BMW ICOM A1ICOM A2 and BMW ICOM A3.

Setup and use Expert Mode directions:

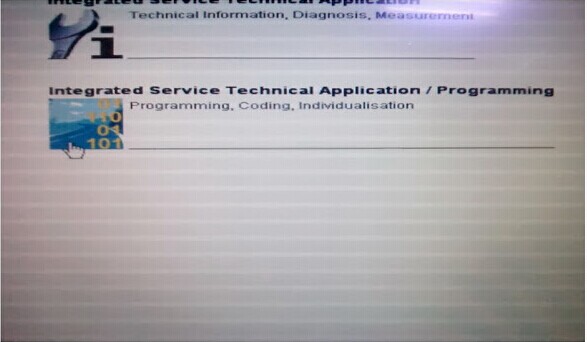
1.  Install BMW ICOM ISTA-D ISTA/P diagnostic& programming software

How-to-configure-Expert-Mode-of-BMW-ICOM-ISTA-D-ISTA-P-1

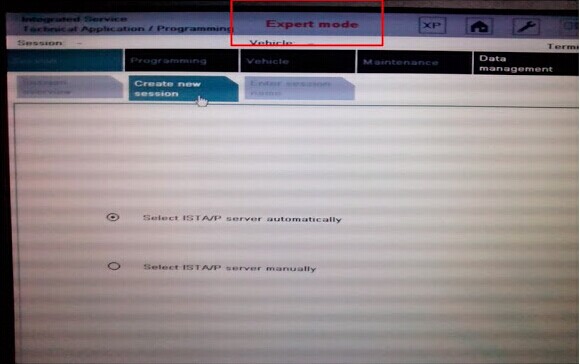
2.  Select ISTA/P server automatically

How-to-configure-Expert-Mode-of-BMW-ICOM-ISTA-D-ISTA-P-2

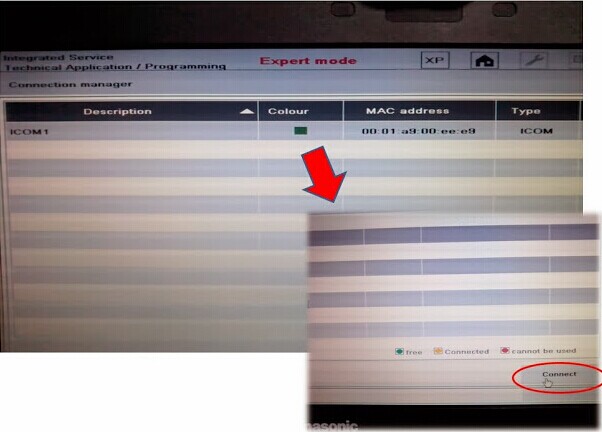
3.  Press “Connect” button on the bottom of the program

How-to-configure-Expert-Mode-of-BMW-ICOM-ISTA-D-ISTA-P-3
How-to-configure-Expert-Mode-of-BMW-ICOM-ISTA-D-ISTA-P-4

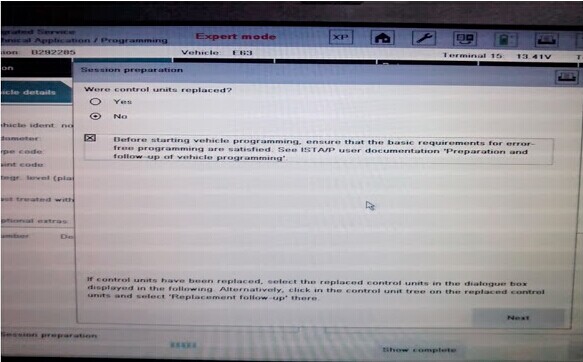
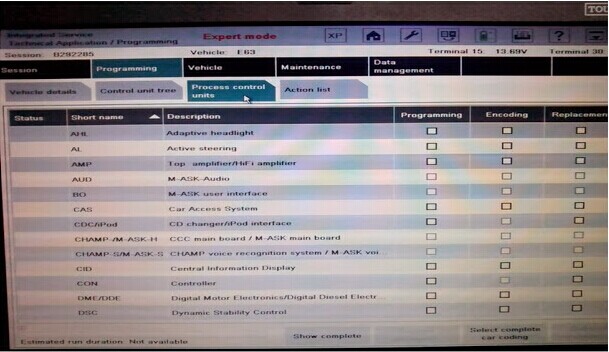
4.  Expert Mode is ready to use. Select Process control units

How-to-configure-Expert-Mode-of-BMW-ICOM-ISTA-D-ISTA-P-5
How-to-configure-Expert-Mode-of-BMW-ICOM-ISTA-D-ISTA-P-6

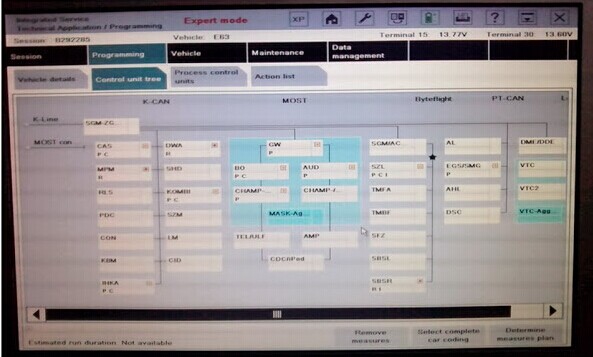
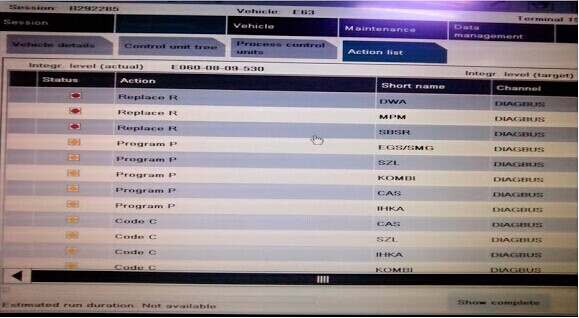
5.  Following is the control module available list. ISTA/P server will detect what control modules should be re-programmed or re-coded automatically.

How-to-configure-Expert-Mode-of-BMW-ICOM-ISTA-D-ISTA-P-7
How-to-configure-Expert-Mode-of-BMW-ICOM-ISTA-D-ISTA-P-8
How-to-configure-Expert-Mode-of-BMW-ICOM-ISTA-D-ISTA-P-9

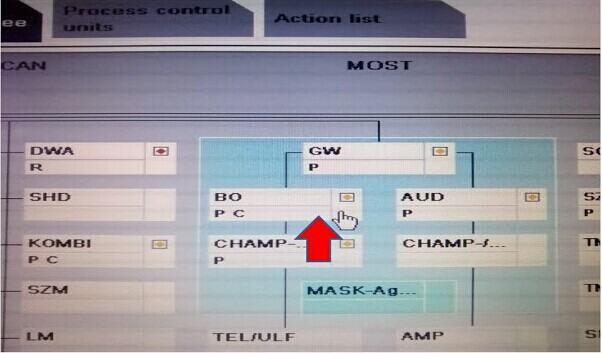
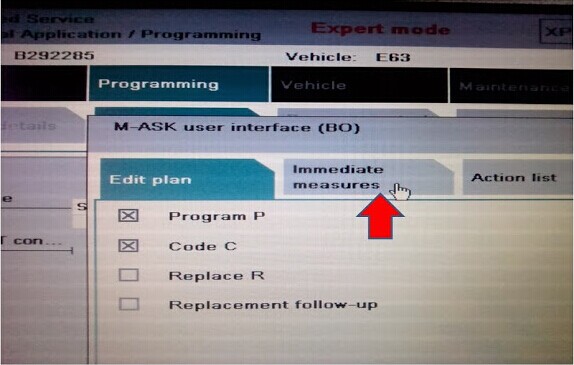
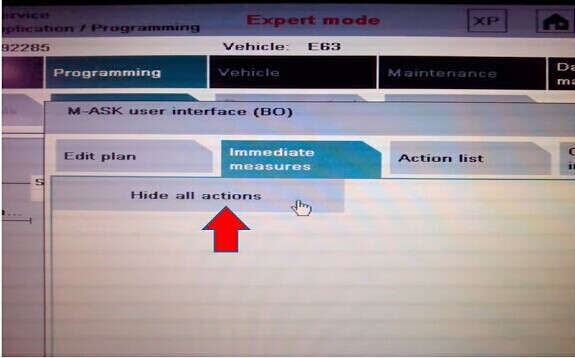
6.  Click immediate measures to hide or enable all actions

How-to-configure-Expert-Mode-of-BMW-ICOM-ISTA-D-ISTA-P-10


Wednesday, November 3, 2021

How to install BMW Ista-D Ista-P Software on Windows 7/8/10

Confirmed! BMW ISTA-D/P works in windows 7, 8 (8.1), 10 without problem. BMW ista software download with Windows 7, Window 8, Windows 10 installation tutorials (updated in 09-2021)

1. BMW ista-d ista-p Windows 7 install:

Usually we main install software with win7 32 bit system, and all test ok!

How-to-install-BMW-Ista-D-Ista-P-Software-on-Windows-7-8-10-1
How-to-install-BMW-Ista-D-Ista-P-Software-on-Windows-7-8-10-2
How-to-install-BMW-Ista-D-Ista-P-Software-on-Windows-7-8-10-3
Step 1: ISTA-D Diagnosis software
Open software
Then double click RHEINGOLD icon to change Full Screen.
Go to Operations, then Read Out Vehicle Data, press Complete identification.
Then follow ISTA prompt to connect the BMW ICOM emulator with vehicle.
When it shows ICOM, then you can click lower right corner Connect to start diagnosis.
(If the Status shows firmware, you see update ICOM firmware first, see instruction in Part 5).

Step 2: ISTA-P Programming software
Open ISTA-P software
Then click “Reset Settings” tab then close.
Open it again
Then select ISTA-P language and then Resolution.
Check the resolution on desktop.   It is the same as ISTA-P resolution you just chose.
Select vehicle type, BMW, MINI, BMW Motorcycle or Rolls Royce.
Then it will select ISTA-P server automatically.

Step 3: ETK
Open ETK software
Click “Extras” tab>> “Settings” to change language and other settings.
KSD
Then click “Settings” to change language and others.

Step 4: Engineer Tools
Engineering & programming software INPA, NCS-Expert, WInKFP etc.
Before using the engineer tools, must set/configure ICOM settings.
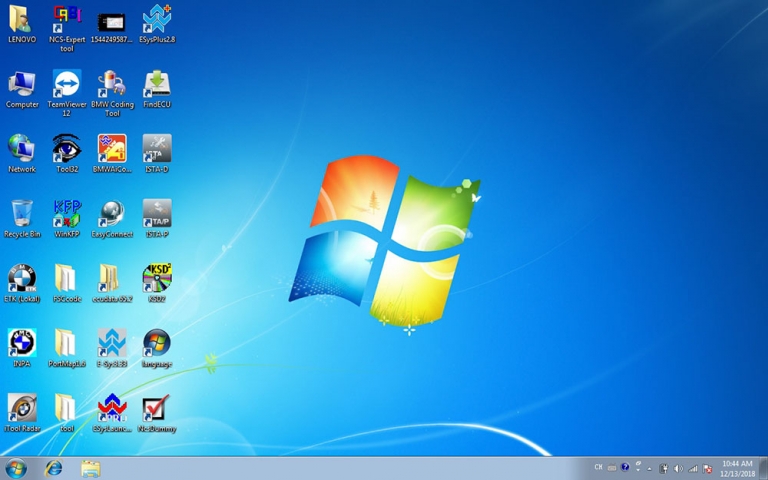
1) Open Engineer Tools, Itool Radar, select first line option.   Then click “Reserve” button on the right.
ICOM Device status will be changed to Reserved.
2) Open EasyConnect, do following settings.
The IP address must be set to correct 169.254.92.38.   Then click “CHECK” button.
Configuration is done.   And then  you can start using engineering software (INPA, WinKFP, etc.)
If you need to update the BMW ICOM Next firmware, please refer to this blog: BMW ICOM NEXT V1.4.0 Firmware Free Download and Update

2. BMW ista Windows 8.1 install:
Easy to do:
install Vredist 2013 and 2015, net framework 4.6.1 or 4.6.2
Install admin client and launcher
put license files in right location
Install all ISTA/P Files
Put all correct files in sharedstorage and install all.
Install standard tools , install patches
Use hardlink for PZData

3. BMW ista Windows 10 install:

Setup on Windows 10 64-bit:
After the Windows 10 update (which failed the first two attempts because it turned out the BIOS needed an update first) most applications were fine.
By simply revisiting the COM port settings for my K + DCAN USB to set back to COM9 , minimum buffer sizes and minimum latency Rheingold ran perfectly.
Loader V3.2 and ISTA-P was a bit more tricky. I re-ran the Network Config Tool. I tried Loader V4.3. No joy. However I did it nicely and ISTA-P runs nicely too, and with the excellent Loader V4.3 .
The Windows Networking and Networking Toolkit for Networking and Networking.
—> The setting was to go into Network Settings , select the USB Loopback which has been renamed ” Ethernet 2 ” and rename it to “USB” then go into its settings just like you would ENET lead and set the IPV4 IP to 169.254.0.8 with a mask of 255.255.0.0

Tip: ista p install help
Question: Where (what path) do you place the SDP contents to support flashing from ISTA?  Also, where do you place the BLP contents as well?
Answer: Put the two folders data and data_swi in C:\Rheingold\PSdZ
And registry:
x86
[HKEY_LOCAL_MACHINE\SOFTWARE\BMWGroup\ISPI\Rheingold]
“BMW.Rheingold.Programming.ExpertMode”=”true”
“BMW.Rheingold.Programming.Enabled”=”true”
“BMW.Rheingold.Programming.PsdzDataPath”=”C:\Rheingold\PSdZ\data_swi”
x64
[HKEY_LOCAL_MACHINE\SOFTWARE\Wow6432Node\BMWGroup\ISPI\Rheingold]
“BMW.Rheingold.Programming.ExpertMode”=”true”
“BMW.Rheingold.Programming.Enabled”=”true”
“BMW.Rheingold.Programming.PsdzDataPath”=”C:\Rheingold\PSdZ\data_swi”

You should be equipped with laptop knowledge and rich in software installation if you want to install BMW icom software yourself.

If you want to know more about bmw diagnositc tools, please click bmw trouble repair.

Monday, November 1, 2021

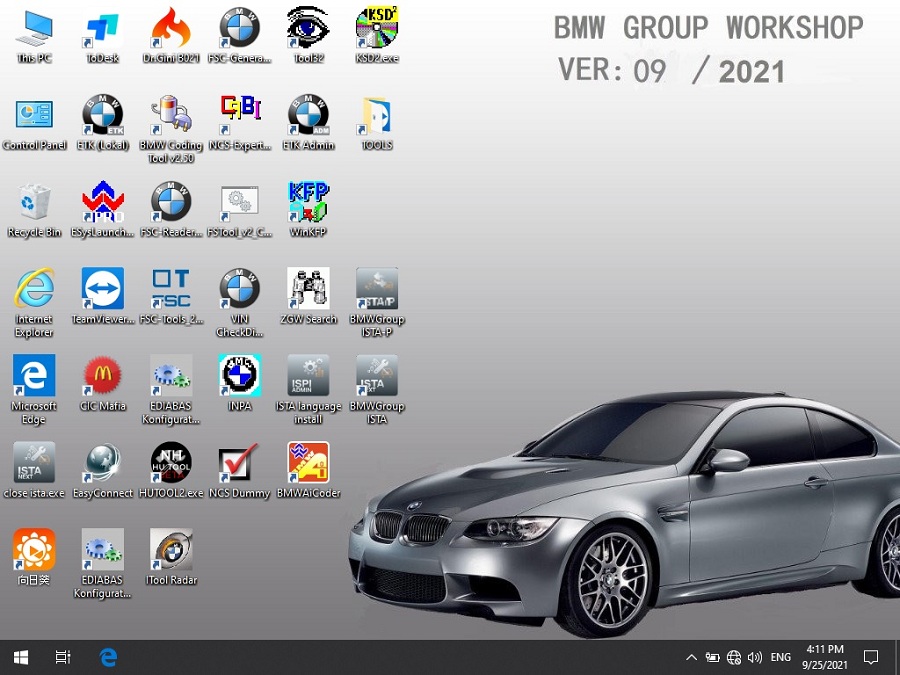
ISTA BMW Software Latest Version 09.2021 Update

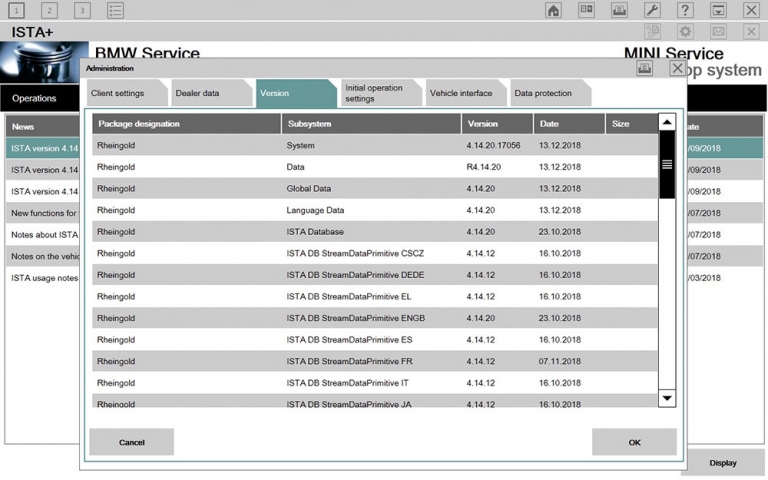
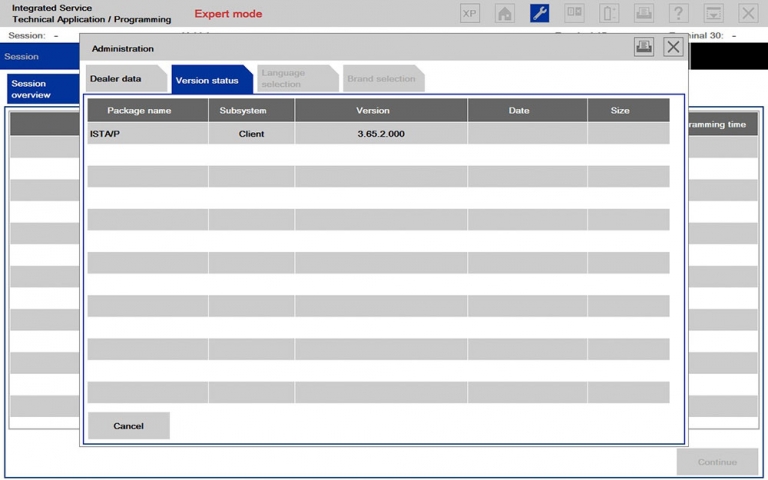
Latest ISTA BMW software with ISTA D:4.30.40 and ISTA P:3.68.0.0008   support diagnosis, coding and programming for BMW till 2021. Full Comprehensive professional dealer system for all BMW up to 2021, full system replace DIS GT1/SSS/OPS and OPPS.

ISTA-BMW-Software-Latest-Version-09.2021-Update

ISTA BMW Software 09.2021 Overview
Software version: 09.2021
System: WIN10 64bit
Software type: 500G HDD/512 G SSD
Multi-languge: ISTA/D(Wiring diagram) Languages: English(Default), French, Spanish, Portuguese, Dutch, German, Thai, Italian, Russian, Korean, Japanese, Chinese, Swedish, Greek.
Vehicle list: Mini, Motorcycles, Rolls Royce, BMW i Series.
Compitable device: ICOM NEXT A, ICOM A2+B+C

V09.2021 BMW Software Contains
ISTA-D: 4.30.40 (update)
ISTA-P: 3.68.0.0008  Support BMW motorcycle and electric car programming
VIN: 2021.07.08 (update)
SDP programming database: 4.30.40, support multi language (update)
ETK: 2019.12
KSD: 2019.11
INPA 5.06
winkfp 5.2.3
NCS 3.5.1
BMWAi: 4.6
E-SYS V3.30 and V3.30, database V68.0, E-SYS  Chinese version
Database V68
Dr. GINI B021
FSC navigation arithmetic software and IBAC code
Add BMW old car DIS software, DISV57 and DISV44, diagnosis and programming
Not connected 9000 days remaining

If you want to know more about bmw diagnositc tools, please click bmw trouble repair.